Starting and working on your National Board Certification for Teaching (NBCT) doesn't have to be such an overwhelming experience. While NBCT does require a lot of strategic planning, project management, time, and effort, my hope is to give you the tools you need to focus MORE time on analyzing and reflecting your teaching practice and LESS time on figuring out those pesky technology logistics or figuring out where the heck you put that Google Doc...
The steps below are applicable to any of the portfolio components 2, 3, or 4. If you're like me and are trying to do them all in one year, you may want to do all these steps for all three components in the beginning just to get yourself set up and ready to go!
The steps below are applicable to any of the portfolio components 2, 3, or 4. If you're like me and are trying to do them all in one year, you may want to do all these steps for all three components in the beginning just to get yourself set up and ready to go!
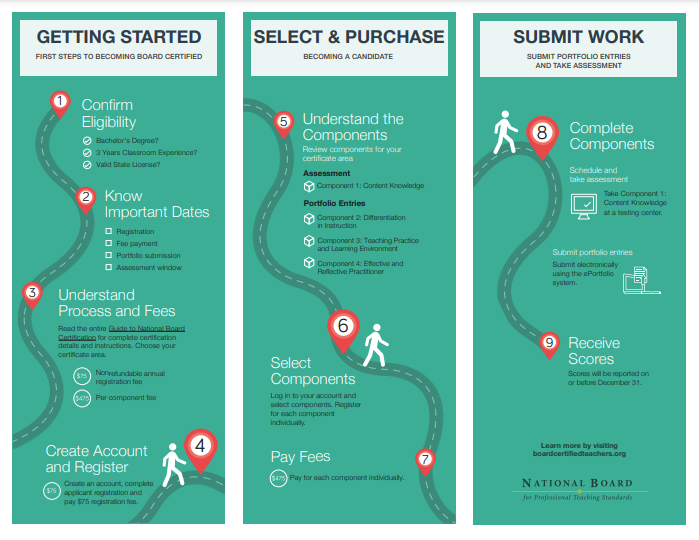
Step 0: Confirm that you're eligible
I definitely don't want to leave out any details about this, so please reference the National Board website at this specific link and read the "Are You Eligible?" section. Some basic requirements are that you have a Bachelor's Degree, at least three years of teaching experience, and have a valid state license. Another big thing to consider is if you'll be teaching at least one class of your desired certification area this year (and next year and/or the year after that depending on how many years you're going to be working on National Board.
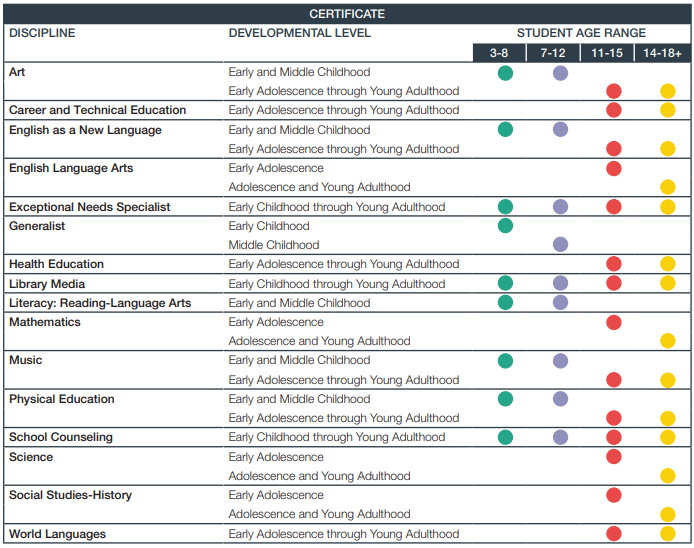
STEP 1: Figure out which certification area you want to do
This is definitely the first step because it affects what your exact portfolio instructions will be. There are a number of certification areas listed by subject/content area and two main age levels: Early and Middle Childhood (EC) and Early Adolescence through Young Adulthood (AYA). See more details here.
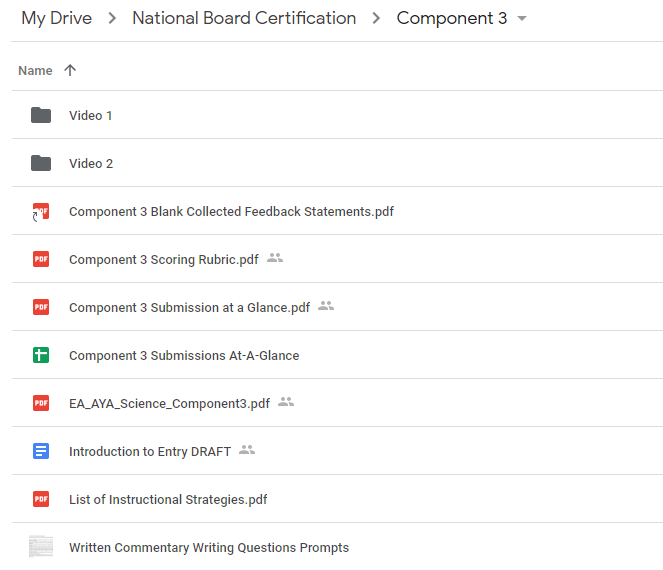
STEP 2: Set Up Your Google Drive Folders
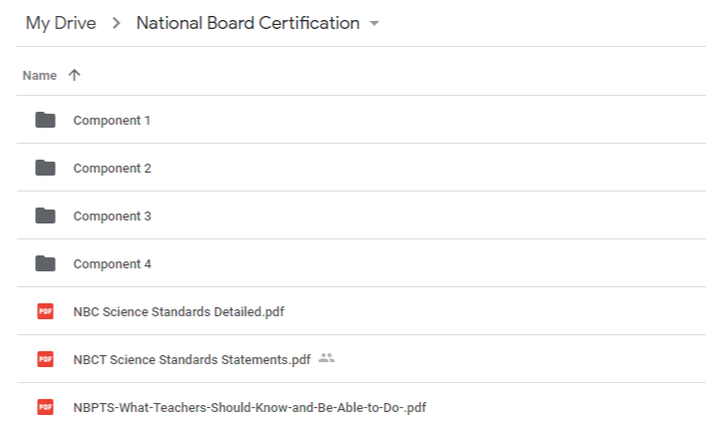
A huge tip for organization is to keep everything organized and work on your components in the same place like Google Drive (or your preferred cloud platform) for a few different reasons: you'll be able to find everything easily, your progress will automatically save, you can access your materials from anywhere, you can create links for each document to put into a spreadsheet (more on this later).
Step 3: download, organize, and print all your relevant instructions

Using this link, find this section "Standards and Instructions for First-Time and Returning Candidates" and identify the drop down menu. Scroll through to select your intended discipline and developmental level. You should get to a screen view like this:
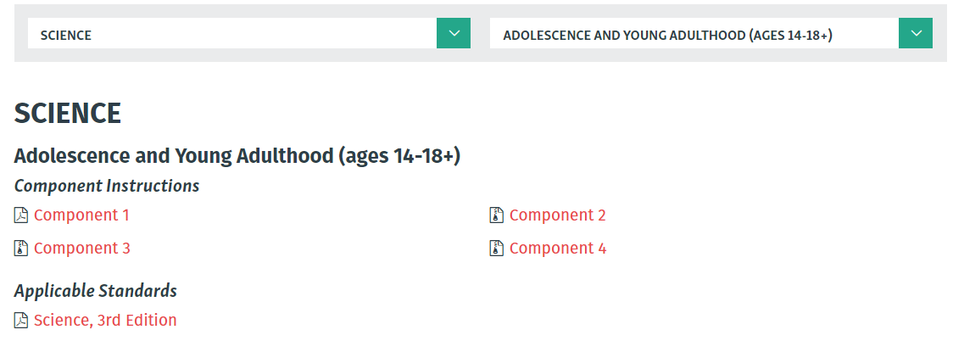
Take a minute to download each of the PDFs and attached forms. Immediately then sort them into your Google Drive folders AND physically print them out (yes it's a lot of paper but seriously worth it - you'll be referencing back and forth to these a lot). I recommend having both your own digital copy in Google Drive and a physical copy; the digital copy makes it easy to Ctrl+F to find key words or instructions you're looking for while the physical copy is easy to annotate on and reference without having to open a ton of new windows.
STEP 4: Read through the standards, annotating key things that you see and Screenshotting/PDF-Printing Important Pages
If you like your physical copy of the standards, definitely highlight and annotate that! For those of you who want to annotate your digital copies on Google Drive, I love this Chrome Extension Kami. Once you download it to Chrome, any time you open a PDF, Kami will show up as an "Open With" option at the top. You can even save your annotations directly on the PDF in your Google Drive. A short video on how to use Kami here.
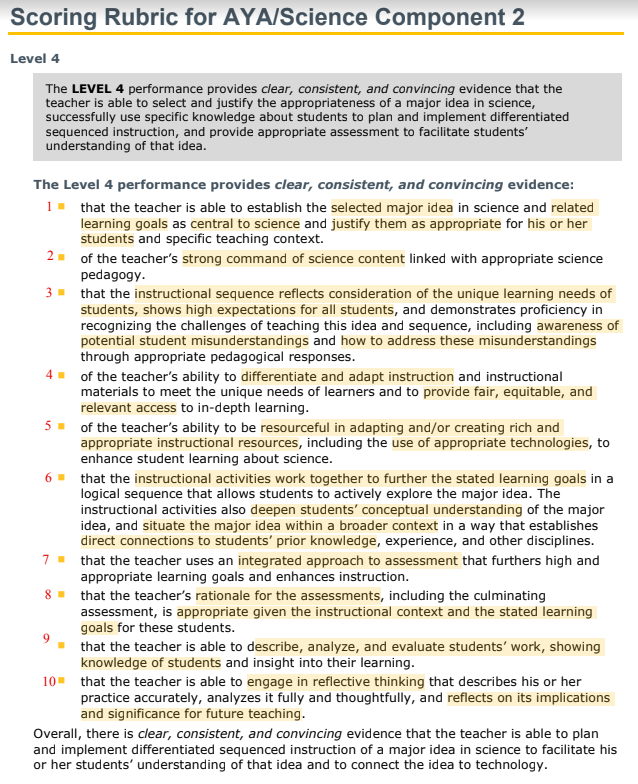
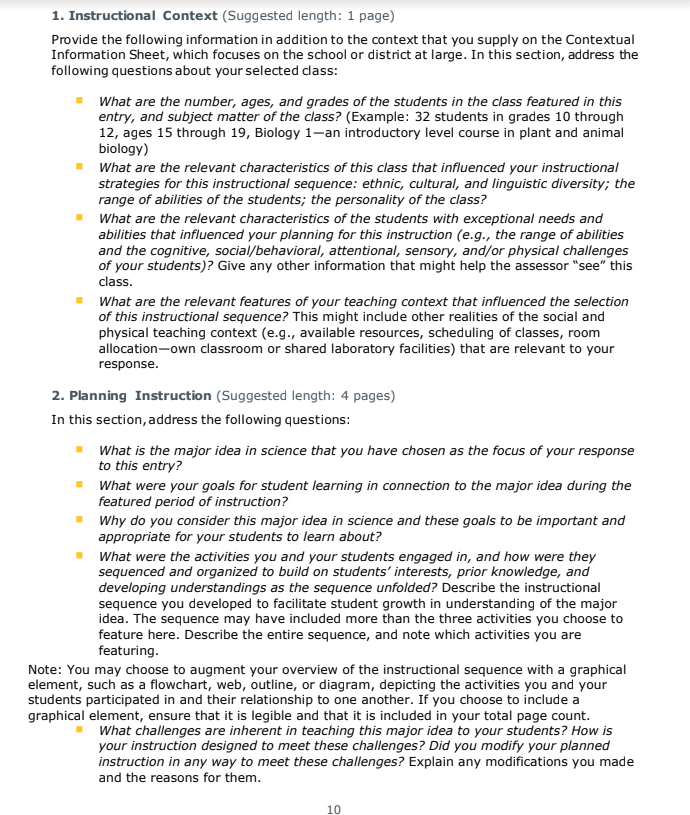
As you read through the standards, there are a few pages you're going to want to save as their own files so you can quickly reference them: Electronic Submission-at-a Glance, Scoring Rubric, and Written Commentary Prompts.
As you read through the standards, there are a few pages you're going to want to save as their own files so you can quickly reference them: Electronic Submission-at-a Glance, Scoring Rubric, and Written Commentary Prompts.
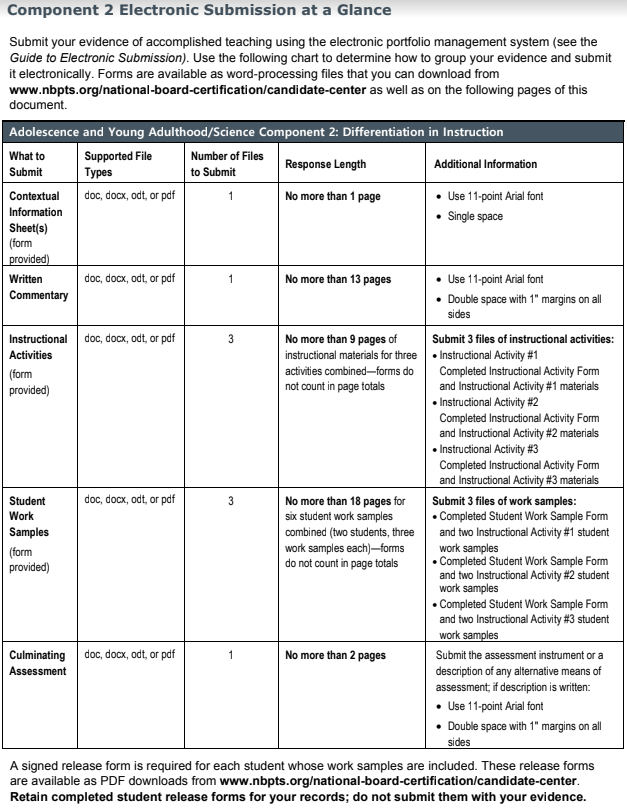
The easiest way to do this is to Print+Save as PDF. When you view the PDF, you should be able to see a printer icon in the upper right corner. If you click that, there will be a drop down menu where you'll need to click "Save as PDF". Under Pages, you'll want to click "Custom" and then just type in the PDF's page number that you want to save. Ta-da!

Step 5: Make sure each form and written commentary has its own google doc in your folders (mAKE sUB-fOLDERS AS NECESSARY)
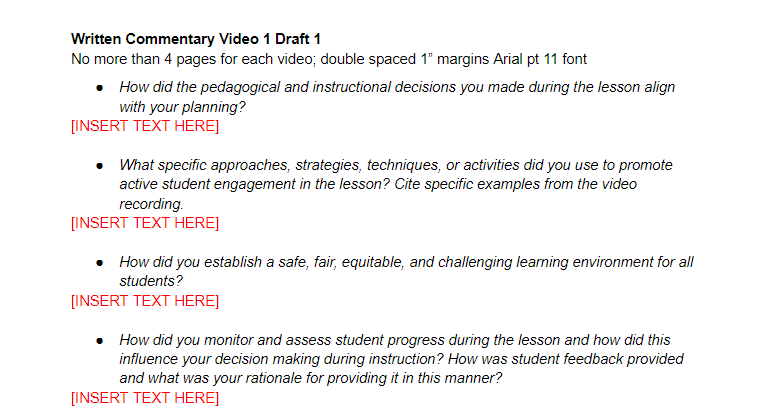
For the written commentary draft Google Doc, I paraphrased the formatting instructions in the header and the copy+pasted the Writing Prompts from each of the component instructions into the Google Doc. I italicized the instructions then added [INSERT TEXT HERE] in red to make it feel almost like a worksheet I needed to fill in. This definitely made it a lot easier to ensure I was directly addressing the writing prompts in my responses while being as concise as possible! Good-bye writer's block!
Step 6: Create a spreadsheet for each component to organize your all your links, both drafts and final pdfs
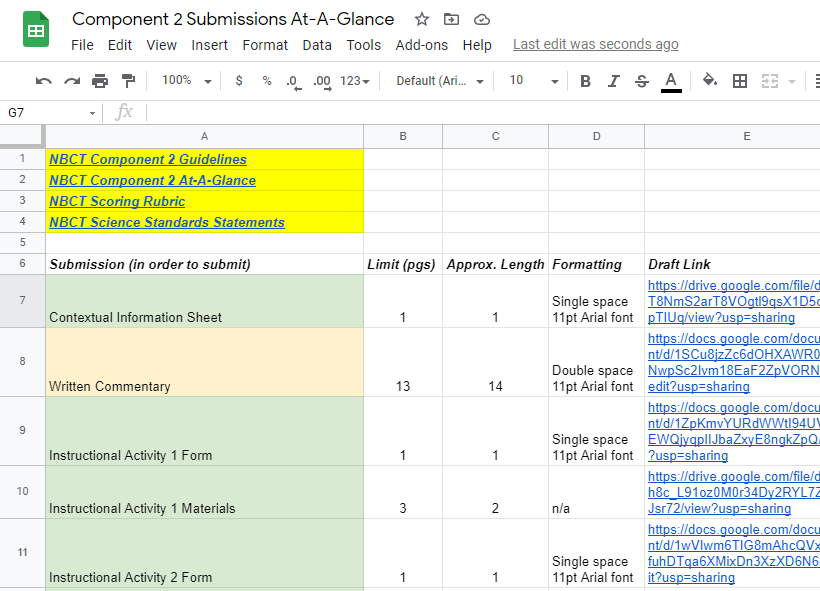
This step was a game-changer for me. While working on my National Boards, I found it hard to juggle all the crazy specific instructions, page limits, forms, etc. Especially because I'm hoping to complete all four components in one year, I really needed to be organized and structured in my progress. Thankfully, all my experience in project management has come in handy and has helped me to make this Component Tracker Spreadsheet.
The top highlighted section links to all those important documents I mentioned in Step 4, so if I need to reference them, they're only one click away. The rest of the spreadsheet just lists out the different submission pieces (I used the Electronic Submission At-a-Glance PDF for this), the page limits and formatting instructions, the approximate length of my drafts, and links to my documents (again, all housed in Google Drive). The color coding you see on the left is what I used to measure my progress with each piece: green means "done", yellow means "in progress", and red means "haven't started".
I use this spreadsheet as my "home page" whenever I get working on any one of my components. It has revolutionalized my National Board process and I hope it helps you manage yours too!
STEP 7+: NOW ACTUALLY GET STARTED!
Everything I wrote above only helps you to get organized and feel like you're getting the ball rolling. While I would argue all of these precursory steps are critical to the National Board process, the most important part is actually gathering your student work and teaching evidence and then writing about it in a clear and compelling way!
My hope is that these tools and resources helped you develop a plan that you will now go execute. Good luck to you in your National Board process and I'd love to hear from you if you have any questions or feedback using this contact form.
My hope is that these tools and resources helped you develop a plan that you will now go execute. Good luck to you in your National Board process and I'd love to hear from you if you have any questions or feedback using this contact form.
