How to Use Chrome Extension Kami to Seamlessly Annotate PDFs
I remember September of last year when I was planning for the upcoming school year and trying to figure out how I was going to teach Biology online; in my in-person classroom, students would often take notes on printed out slide decks, color and label diagrams, draw models, etc. How could I replicate that experience when a large majority of my students would be working off school-issued Chromebooks and definitely did not have printers? The God-send? Kami.
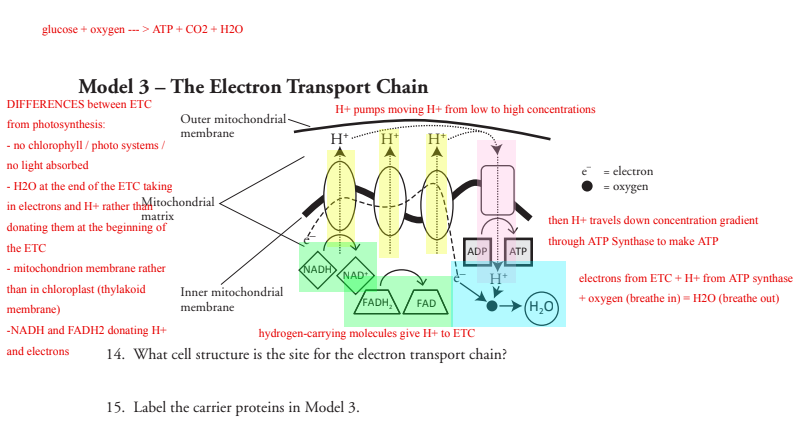
Here's an example of how I and my students have been using Kami in biology this year.
How to download Kami
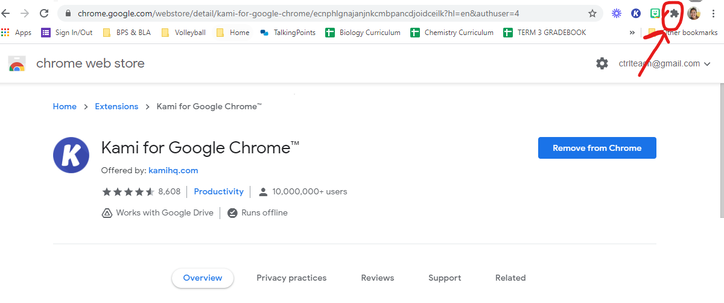
Go to this link where you can download the Chrome Extension onto your Google Chrome browser. Once you've downloaded it, it should be visible in your Extensions (the puzzle piece looking thing at the upper right corner next to URL bar on Chrome).
How to Use Kami to Annotate Any PDF
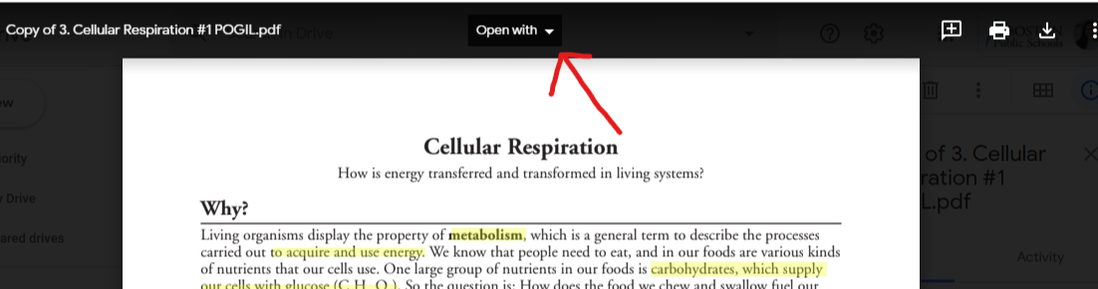
Once you've downloaded the Kami Chrome Extension, you should be able to access it any time you're opening or looking at a PDF. You'll want to find the "Open With" option at the top and then click the arrow to expand your options. Kami will be listed there.
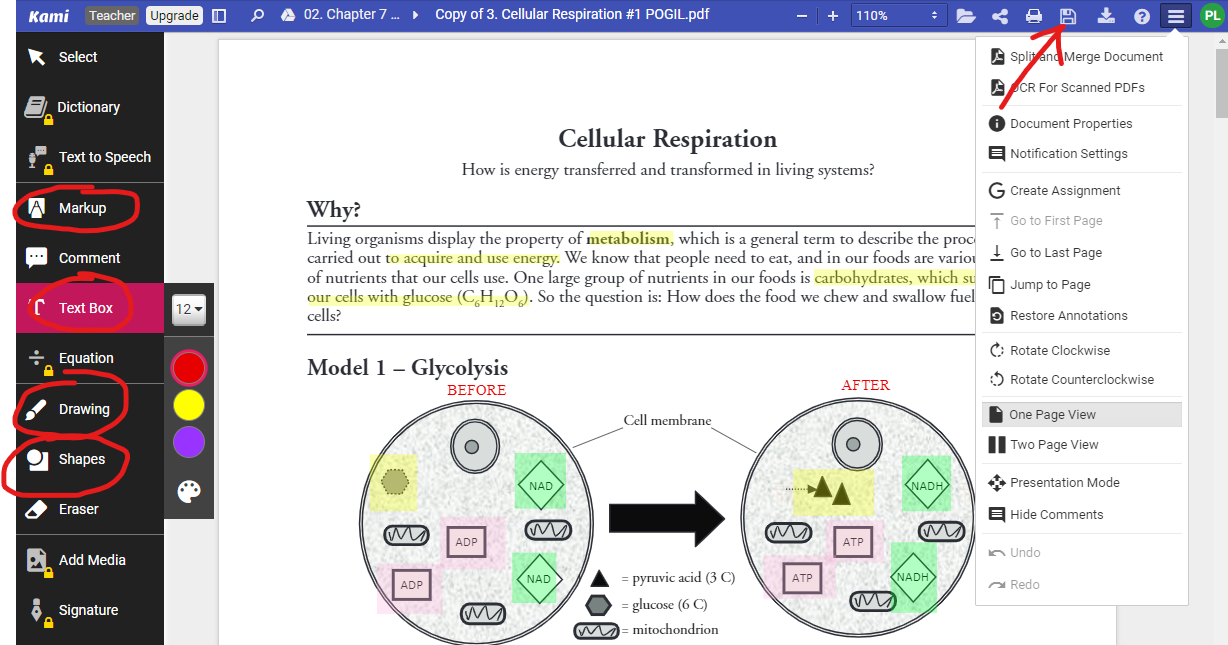
There are a ton of features that you can use on the basic (free) version of Kami. A few that I use frequently are "Markup" (text and box highlighters), "Text Box", "Drawing", and "Shapes". Don't forget to click "Save" on the upper right corner if you want your annotations to be updated on the PDF. If you don't click "Save", then your annotations will only live within Kami, not the actual document.
Video Tutorial: how to download and use kami
As always, here's a video tutorial if you'd like more step-by-step guidance.
